The blog provides the usage of Constructor in React Application. The concept of Constructor in React is similar to what we implement in other languages like C++ , Java.
What is a Constructor in React ?
The Constructor can be defined as given below
The constructor is used to initialize an object’s state
The constructor is invoked when an object is created in the class
The constructor is called in React when a component is mounted
The constructor is called using super(props)
this.props remains undefined if super(props) is not called in the class
How React uses constructor ?
Initialize the local state by assigning an object to this.state
Binds Event handler methods to an instance
How State should be initialized in the constructor() ?
The Constructor should not be called this.setState() in the constructor
We should use this.state to initialize the local state in the constructor
When constructor should be used in React Component ?
Usage of Constructor is not mandate for all the React Component. Constructor helps to initialize the object state before it is actually being accessed / modified. That is , when we need to set a object property or to access the object local state , then constructor should be called using super(props).
If the super(props) is not defined in the constructor and program try to access the object value using this.props , then React will throw the error -> ‘this’ is not allowed before super().
class App extends Component {
    constructor(props){
        // wrong assignment, super(props) is not defined
        this.siteName = "www.oracleappshelp.com";
    }
    render () {
        return (
            <p> Site Name : { this.props.siteName }</p>
        );
    }
}
class App extends Component {
    constructor(props){
      // correct  assignment
		super(props);
        this.siteName = "www.oracleappshelp.com";
    }
    render () {
        return (
            <p> Site Name : { this.props.siteName }</p>
        );
    }
}
this.props will be undefined in the Cosntructor if super(props) is not called.
Use Constructor to bind functions in React Component
The constructor in React Component is useful when we need to bind functions as per below given example . The button clickSubmit is binded using this
The blog provides the difference between React and Vue. Although both React and Vue are the popular Java Script frameworks and provides similar functionalities like component -based Architecture, State and Props , Updating Virtual DOM but their usage depends on the specific business needs.
React Java Script Framework
Vue Java Script Framework
React is used for building reusable components
Vue is used for building reusable User Interfaces and single page applications
React is declarative, efficient and flexible open-source Java Script Library
Vue is an open-source library supporting progressive framework
React was developed by Jordan Walke, a software engineer at facebook
Vue was developed by Evan You, a former employee at Google
React was released to public on May,2013
Vue was released to public on February, 2014
React can be easily integrated with 3rd party libraries
Vue has limited flexibility to adapt 3rd party libraries
React uses JSX for Java Script Expression which is generated code similar to HML
Vue provides styling similar to Angular by separating HTML, JS, and CSS
React supports one-way binding which means only model can update the application state
Vue supports one-way and two-way binding which means not only model but UI field change is bounded to model change
React support Java Script / XML
Vue supports HTML/ Java Script
React provides extensive support for External Tools (React CLI Tool for create-react-app) and IDEs (Visual Studio Code)
Vue provides limited external tool supports when compared to React although it also supports Vue CLI Tool and IDEs
React being a popular library provides long term support
The blog provides the listing of differences between React JS State and React JS Props.
ReactJS State
The State is used to contain data or related information about the component in React and determines the component behavior and depicts how the data is rendered to the DOM Structure. The usage of State makes the component more dynamic and interactive. The State represents the component’s local state and can be modified inside the component or sometimes by the component directly.
ReactJS Props
Props in React are similar to properties which are read-only and are passed as argument within the component. It acts as the function arguments and allows to share data among components. Props are immutable as we cannot modify the values of props within the component. Thus , it is preferred to define the components with the State which can be updated with the change in the component.
What is common between State and Props
Both ReactJS State and Props can get initial value from parent Component
Both ReactJS State and Props can set default values inside Component
Both ReactJS State and Props are plain JS objects
Difference between ReactJS State and Props
React JS State
React JS Props
State is used to contain data or related information about the component in React
Props in React are similar to properties which are passed as argument within the component
State of the component can be modified
Props in react are read only
State is mutable
Props is immutable
States helps in rendering the modifications with the component
Props are used to communicate between components
State is restricted to be accessed by child components
Props can be accessed by the child component
State holds component data
Props allows to pass data using arguments between components
State cannot be used as reusable components
Props can be used as reusable components
State is internal to the react components
Props are external used to pass arguments between components
The tutorial provides the detail on the usage of Lists and Keys in React application, defining list components, defining keys, extracting components with keys, unique keys with arrays, List example in React, Key example in React
What is List in React ?
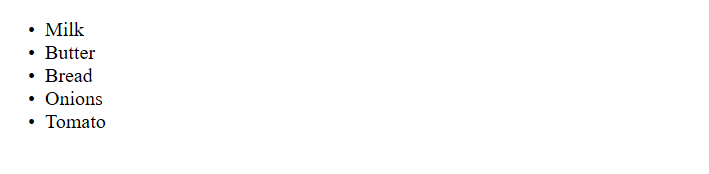
List is the way of representing the data in the orderly format using JavaScript. The below given is the simple example of array numbers using JavaScript map( ) function to return the list elements
Creating the List in React is similar to javascript. List in React uses the javaScript map( ) function for traversing the list element and for list element updates. The defined List Items are enclosed within the curly brackets { } . Use <ul> </ul> for returning the list items. The lsit items can be rendered using reactDOM.render () method.
The tutorial provides the usage of events in React Application, synthetic events in React, event declaration in React, event example in React.
What is an event in React ?
Any user action on the Application front end or system generated action creates an event , triggered to perform specific operations. The click on the mouse, pressing keyboard, application operations each classifies as an event. Although the event handling in React is similar to handling events in the DOM , but few points need to be considered:
React events are named using camelCase
React JSX uses function as event handler rather than string
<button onClick={updateUser}> Update </button>
React cannot return false to prevent default behavior rather need to use preventDefault explicitly
The event handling in React uses the Synthetic Event mechanism , a cross-browser wrapper around the browser’s native event and provides the native event interfaces like stopPropagation() and preventDefault().. In the above example, e is a Synthetic Event which is defined according to the W3C spec.
Synthetic Event Pooling:
Synthetic events supports pooling. The object in synthetic events can be reused and all properties will be nullified after the event callback is invoked. To access the event properties in an asynchronous way, event.persist() should be called on the event which removes synthetic event from the pool to allow reference to the event.
Registering Event in Capture Phase: Events can be registered for the capture phase. Appending the Capture to the event name instead of using onClick (example – onclickCapture) allows to handle the capture phase. The below given are the supported events:
The tutorial provides the usage of Forms in React Application, Forms control inputs, Forms using Controlled component in React, Forms using Uncontrolled component in React, Difference between controlled and uncontrolled component in React, Forms examples in React.
What is Forms in React ?
Forms are the control inputs like text fields, buttons, checkbox, radio button, etc to develop the front end for any web based application using React. The data captured in the React Forms is managed by the React Components and application operations can be performed.
Forms Type in React
The Forms can be classified in below given categories
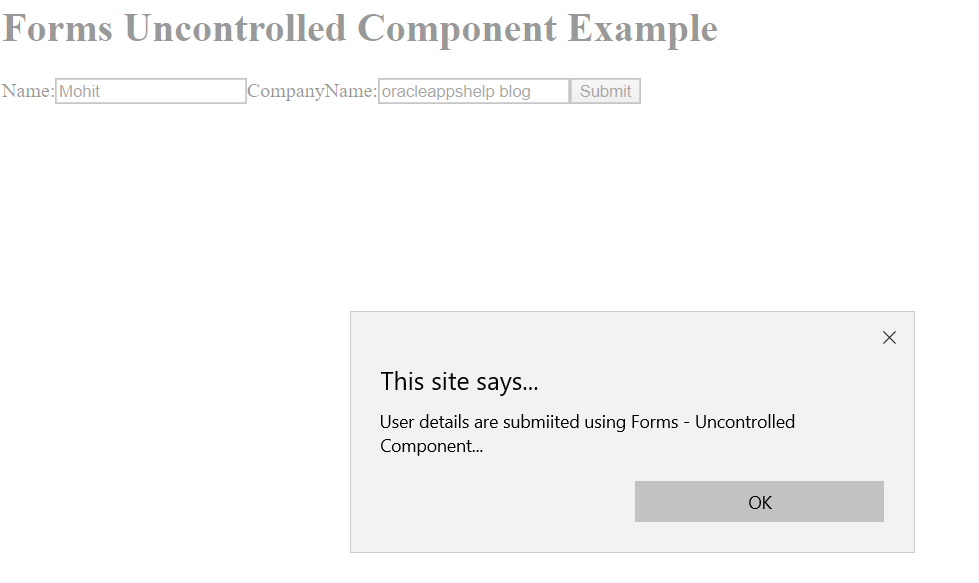
Forms using Uncontrolled component: The data change is handled as the traditional HTML form inputs where the form change is handled by the DOM itself. The uncontrolled components requires the ref to read the values from the DOM structure.
Forms using Controlled component: The data change in the form is handled by the controlled components in React instead using the event-based callbacks of handled by DOM as the traditional approach which allows react to provide stateful and interactive approach. The state within the component is updated using the setState() method
Difference between Controlled Component Vs Uncontrolled Component
Controlled component in React
Uncontrolled Component in React
Controlled component maintain the state
Uncontrolled component does not maintain state
Form data is handled by the Parent component
Form data is handled by the DOM itself
Retrieves the current value using props
Retrieves the current value using ref from the DOM
allows to perform validations
validations cannot be performed
Forms Example using uncontrolled component in React
The tutorial provides the detail on the usage of props in the React application, How to define default Props, Props example, State and Props Example.
What is Props in React ?
Props in React are similar to properties which are read-only and are passed as argument within the component. It acts as the function arguments and allows to share data among components. Props are immutable as we cannot modify the values of props within the component. Thus , it is preferred to define the components with the State which can be updated with the change in the component.
The attributes in the component can be accessed using this.props and use render( ) method to render dynamic data among the components.
Example – the below example in App.js read the value from props attribute which is being pass from Main.js using reactDOM.render( ) method.
import React, { Component } from 'react';
class App extends React.Component {
   render() {
      return (
          <div>
            <h1> Hello All , Oracleappshelp.com Admin Name is : { this.props.admin } </h1>
            <p> <h4> This the simple example of  using props in React</h4> </p>
          </div>
      );
   }
}
export default App;
import React from 'react';
import ReactDOM from 'react-dom';
import App from './App.js';
ReactDOM.render(<App admin="Mohit Sharma" />, document.getElementById('app'));
Response for Props example
Defining Default Props in the component
We have seen how to pass the props using the reactDOM.render( ) method but props can also be defined as default within the component. The below example shows how component can read the default props value.
import React, { Component } from 'react';
class App extends React.Component {
   render() {
      return (
          <div>
              <h1>Define Default Props in React Component</h1>
            <h3>Hello All, Oracleappshelp.com admin name is  {this.props.admin}</h3>
            <h3>His hobby is  {this.props.hobby}</h3>
            <p>Another props example with the usage of default props value</p>
          </div>
        );
    }
}
App.defaultProps = {
   admin: "Mohit Sharma",
   hobby: "blogging"
}
export default App;
import React from 'react';
import ReactDOM from 'react-dom';
import App from './App.js';
ReactDOM.render(<App />, document.getElementById('app'));
Response for default props example
State and Props Example
We have seen the example for using State and Props separately. The below given example provide the usage of both State and Props. The State has been defined in the Parent Component using Constructor and passing the value to the child components using props.
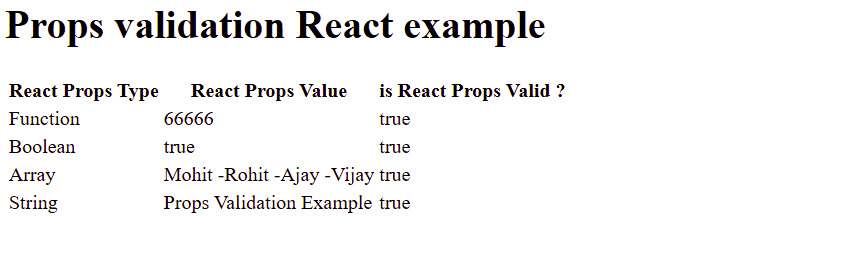
Props Validation is the process to ensure that the defined props values are correctly mapped with the attributes as per the definition. This helps in avoiding application issues at the run-time and validate the drill down value for each component being used.
The below given are the validators which can be used while defining props in React Application.
React Props Type
React Props Type Description
PropTypes.number
props defined as an number
PropTypes.object
props defined as an object
PropTypes. array
props defined as an array
PropTypes. func
props defined as a function
PropTypes. any
props defined with any data type
PropTypes. bool
props defined with boolean type
PropTypes.string
props defined as string
PropTypes.symbol
props defined as symbol
PropTypes.element
props defined as an element
PropTypes.node
props defined as the node
PropTypes.oneOf()
props defined as one of several types of values
PropTypes.instanceOf
props defined as an instance of a particular JavaScript class
The tutorial provides the insight on the usage of State in ReactJS, Stateful state and Stateless state , state syntax and state examples using React.
What is State in React ?
The State is used to contain data or related information about the component in React and determines the component behavior and depicts how the data is rendered to the DOM Structure. The usage of State makes the component more dynamic and interactive.
State methods in React
The State in the component can be set by invoking the setState( ) method. To retrieve the initial state in the component, use getInitialState( ). The State can be accessed or modified within the component or sometime by the component itself.
Stateful State example in React
We need to create the constructor to be assigned with the initial state value. The defined state in the component can be accessed using this.state inside the render( ) method. The below code checks for the status value and toggle the display message. Currently the value for status is set to true . The value of state is being set using the super() in the constructor.
import React, { Component } from 'react';
class App extends React.Component {
 constructor() {
      super();
      this.state = { status: true};
      }
      render() {
          const displayMessage = this.state.status ? (
              <div>
                  <p><h3>The Application status is now - Completed.</h3></p>
            </div>
              ) :  (
                  <div>
                      <p><h3>The Application status is currently - Inprogress.</h3></p>
                </div>
                  ) ;
              return (
                  <div>
                      <h1> Welcome to Demo Application </h1>
                      { displayMessage }
                  </div>
              );
     }
}
export default App;
The Ouptut message should be:
” The Application Status is currently – completed”
Now if we change the value of status to false and rerun the application, the other message will be shown ” The Application Status is currently – Inprogress”
The tutorial provides the insight on the usage of React components. The traditional methodologies ends up with the lengthy code piece which becomes difficult to maintain and requires more effort in case of bug fixing.
In the traditional approach, where the develop components when updated it required the traversal of the complete DOM Tree to find the DOM element which needs to be updated and thus makes the DOM Manipulation as an expensive action.
What is React component ?
With React Components, the complex code piece is divided into small JavaScript Functions termed as “components” which results into independent , reusable , isolated code with ease of maintainability.
With React JS Library, the React JS Components uses the Virtual DOM which provides the abstraction of the actual DOM where components are represented as nodes. Through React JS library we can now update the Virtual DOM by updating the component itself and thus avoid complete DOM Tree traversal which makes it performance oriented.
The components (which are usually JavaScript functions) accepts inputs called as “props” and in return provides the React elements as the view output. The components can be classified as:
Functional components (use of function as component)
Class Components (use of class as component)
How to create a React JS Component ?
The below given is the simple React JS App.js file where
App– is the component name , should be given with Pascal Casing
render() – is the method used to render the component elements
React.createElement – helps in creating the javaScript element
The tutorial provides the detailing about the React JSX (JavaScript Extension) and its features.
What is React JSX ?
The JSX feature in React programming provides the extension to JavaScript which helps in converting the HTML tags to the react elements and provides the mix of HTML and JavaScript together. React JSX provides the template script instead of using regular JavaScript.
In other words, the render functions of React provides the HTML like syntax used by React to extend the ECMAScript to allow HTML like syntax to be used with JavaScript and React.
JSX Example
The below given is the sample code for JSX.
<div> Hello Oracleappshelp Users </div>
The normal HTML tags provided below is converted to react element which includes the div tag, argument passed and content value.
The JSX templating provides the optimization to the react code and thus makes it perform faster
React overcomes the usage of code logic and markup languages separately with the usage React components which helps in combining the both.
JSX is type -safe and thus avoid errors at the run -time
JSX provides easier way to create templates.
Nested elements in JSX
With the usage of JSX , it is feasible to return multiple elements within the same container. The below given simple example demonstrate the same.
import React, { Component } from 'react';
class App extends Component{
   render(){
      return(
         <div>
            <h1>Oracleappshelp Tutorials</h1>
            <h2>Oracle and Open Source Technology Blog</h2>
            <p>The Oracleappshelp pupose to help the community in learning new technologies and providing easy step by step tutorials</p>
         </div>
      );
   }
}
export default App;
JSX Attributes
The below points need to be considered for the JSX Attributes
JSX allows attribute to be used with the HTML elements
JSX allows custom attributes to be created
JSX uses camelCase naming convention for the attributes. Thus, class in HTML becomes className in JSX, for in HTML becomes htmlFor in JSX
Syntax for using custom attribute is data-prefix
The below given example demonstrates the use of JSX Attributes
import React, { Component } from 'react';
class App extends Component{
   render(){
      return(
         <div>
            <h1>Oracleappshelp Tutorials</h1>
            <h2>Oracle and Open Source Technology Blog</h2>
            <p data-customAttribute = "custom">The Oracleappshelp pupose to help the community in learning new technologies and providing easy step by step tutorials</p>
         </div>
      );
   }
}
export default App;
JavaScript expressions in JSX
JSX also provides the use of JavaScript expressions. The use of curly brackets {} allows to provide the expressions that need to be evaluated. The below given example demonstrates the use of JSX JavaScript expressions
import React, { Component } from 'react';
class App extends Component{
   render(){
      return(
         <div>
            <h1 style ={customeStyle}>{12345 + 54321}</h1>
           {/* JSX allow to enter the comments in this way within the curly brackets */}
         </div>
      );
   }
}
export default App;
Ternary expression in JSX
JSX does not support if else conditions but allows to enter the ternary expressions for the evaluation of the condition at the run-time. The below given is the simple example with the usage of ternary expressions.
import React from 'react';
class App extends React.Component {
   render() {
      var value = 100;
      return (
         <div>
            <h1>{value < 100 ? 'True!' : 'False'}</h1>
         </div>
      );
   }
}
export default App;
JSX Comments
Comments can be added in the JSX using the /* and */ within the curly brackets. Refer the above example with the comments added using JavaScript expressions
JSX Styling
React provides the inline style using the camelCase syntax. Syntax for using custom style is style ={customStyle} Refer the above example with the style added using JavaScript expressions
The tutorial provides the step by step installation process for installing React . The prerequisite for installing React is the node.js installation. The tutorial for node.js can be referred here node.js installation steps
React Installation approaches:
React Installation using create-react-app command
React Installation using webpack and babel with npm commands
React installation using webpack and Babel
React can be installed using the webpack and babel . webpack is the module bundler which helps in installing and managing independent modules and provides as a single file bundle for the compilation.
Babel is a JavaScript compiler and transpiler which helps in providing ES6 features and also converts one source code to another.
Below given are the installation steps for React using webpack
Create the folder “reactApp” which will contain the required installation files for developing React application.
C:>mkdir reactApp C:>cd reactApp
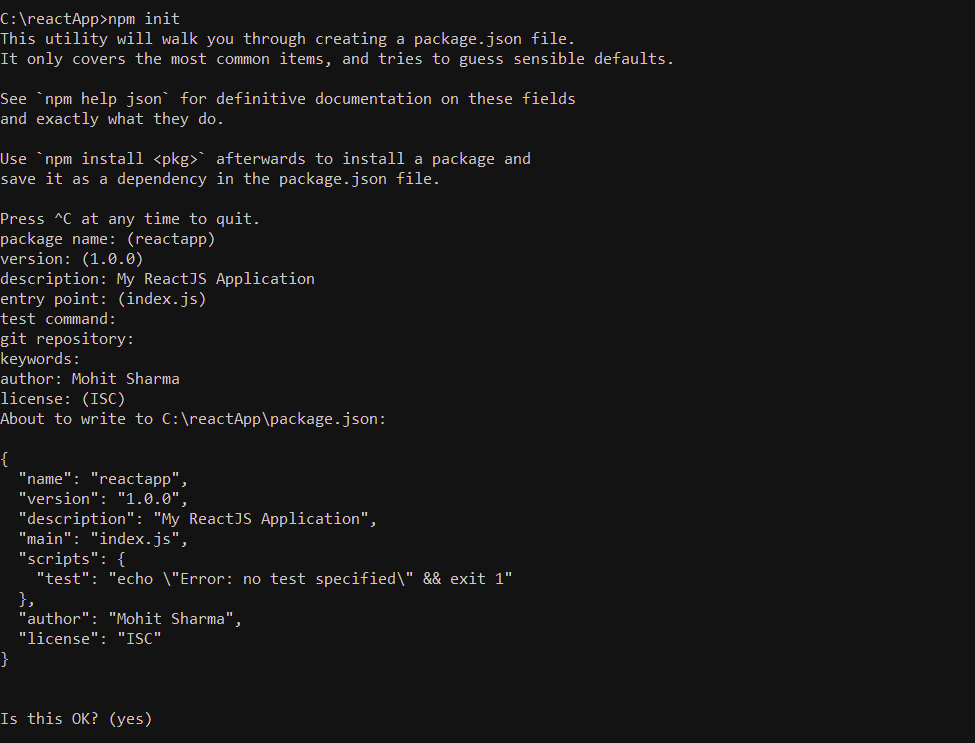
Each Reach application, requires package.json file which can be cretaed using the below given init command. Provide the required information for the description, package name, git repository , keywords, author, etc
C:\reactApp>npm init
install react using webpack and babel
You can also execute the below command which creates the package.json file with the default values.
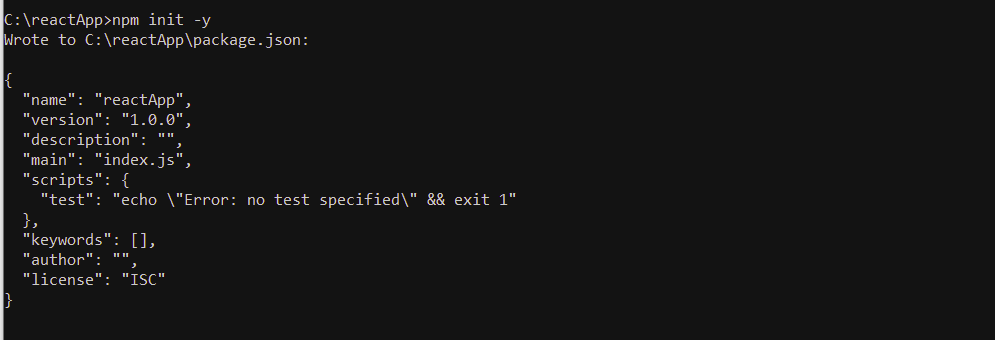
C:\reactApp>npm init -y
init -y comamnd for creating package.json file
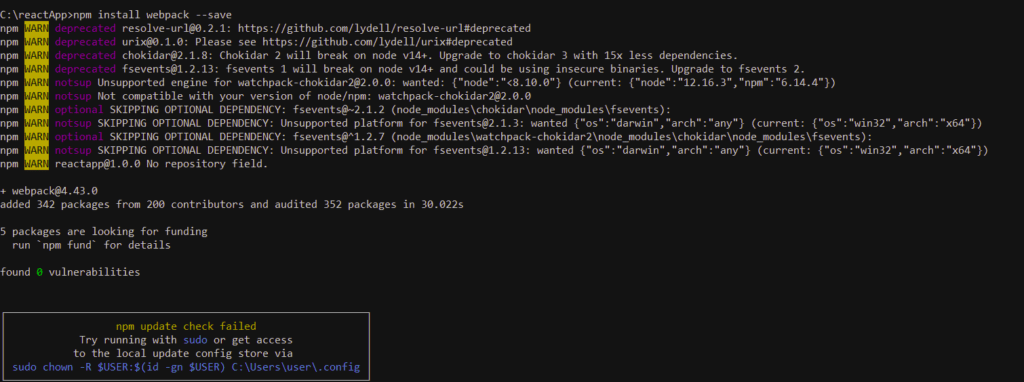
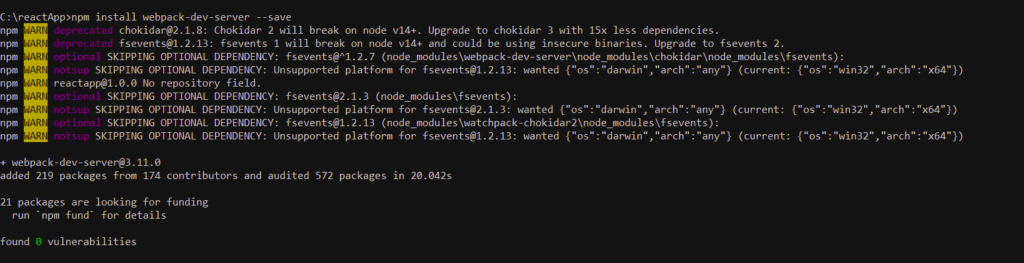
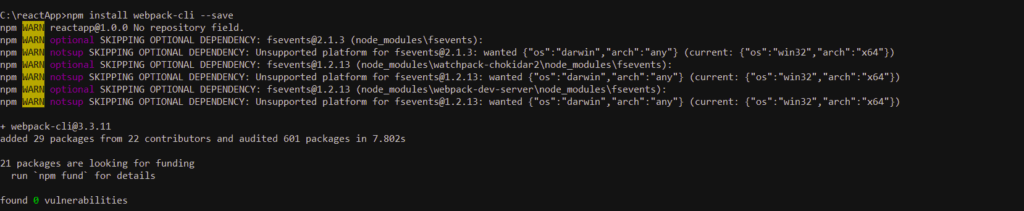
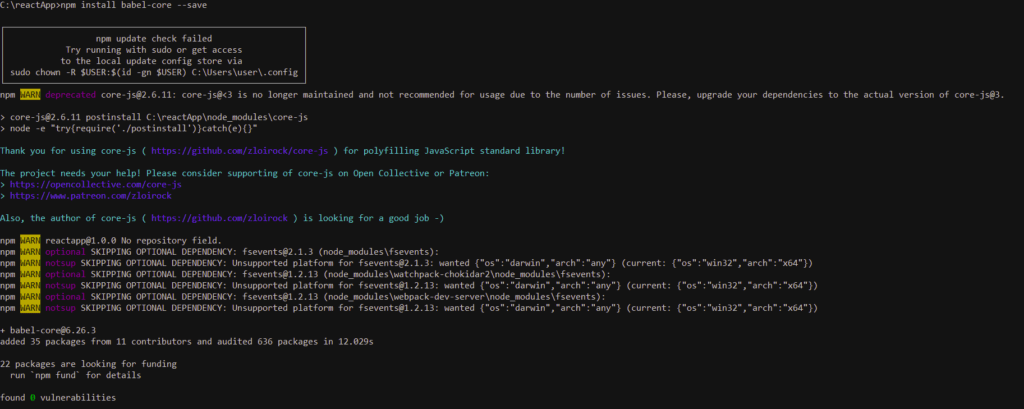
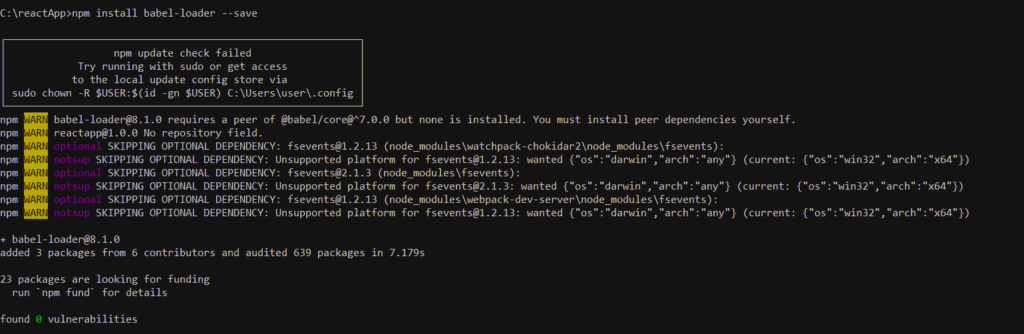
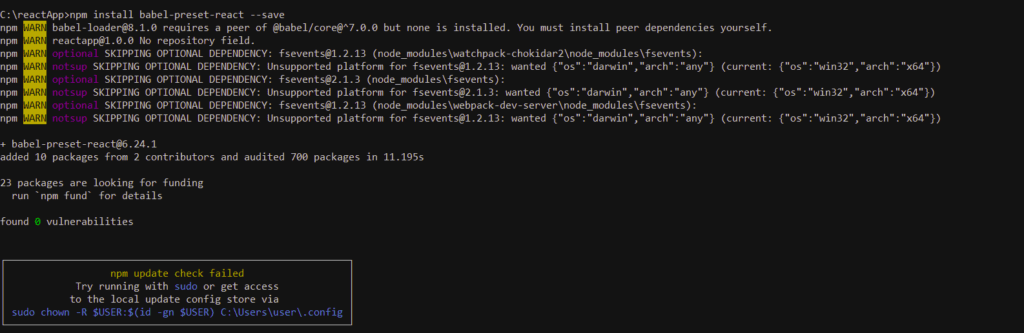
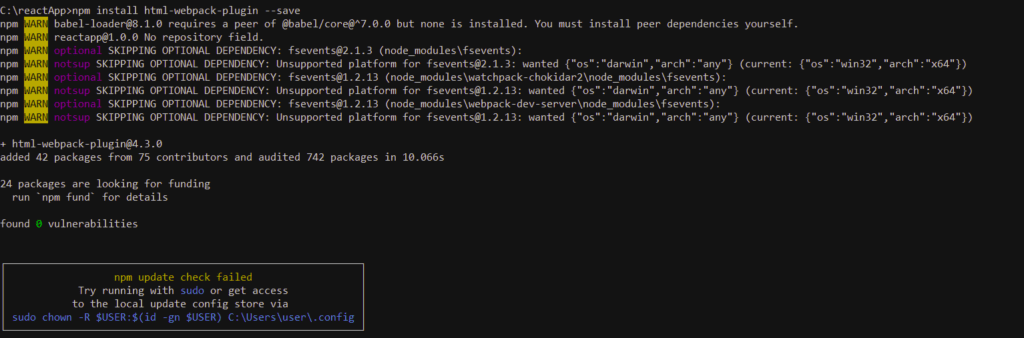
Now execute the below npm commands for installing the React modules
install babel core using npm command install babel loader using npm command install babel preset environment using npm command install babel preset react using npm command install html webpack plugin using npm command
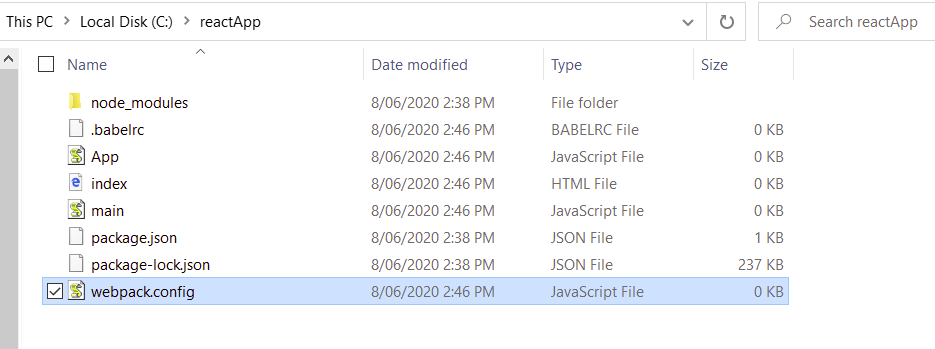
The below given files need to be created as part of the installation process to be used by the React application. C:\reactApp>type nul > index.html C:\reactApp>type nul > App.js C:\reactApp>type nul > main.js C:\reactApp>type nul > webpack.config.js C:\reactApp>type nul > .babelrc
Remove the below given command from the scripts object if developer needs to work on the development activities and application testing is not required initially.
“test”: “echo \”Error: no test specified\” && exit 1″
Instead add the below given commands for the start and build commands
“start”: “webpack-dev-server –mode development –open –hot”, “build”: “webpack –mode production”
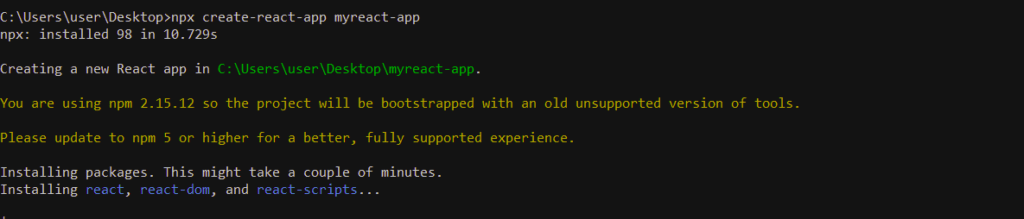
react installation using react-create-app command
React Installation can be done using the create-react-app command. The below given command creates the folder with name “myreact-app” and all required files are installed in the folder
Add index.js and index.css file to the source folder
C:\Users\user\Desktop>cd myreact-app\src> type nul > index.js
C:\Users\user\Desktop>cd myreact-app\src> type nul > index.css
Add the below code lines to index.js file
import React from 'react';
import ReactDOM from 'react-dom';
import './index.css';
Common Errors while installing React using Webpack and Babel
Failed to build the babel loader
This happens when the React uses the higher version to run the babel loader .
Run the babel loader command with the higher version
C:\reactApp>npm install babel-loader@8 --save-dev
error while running the React Application after installation
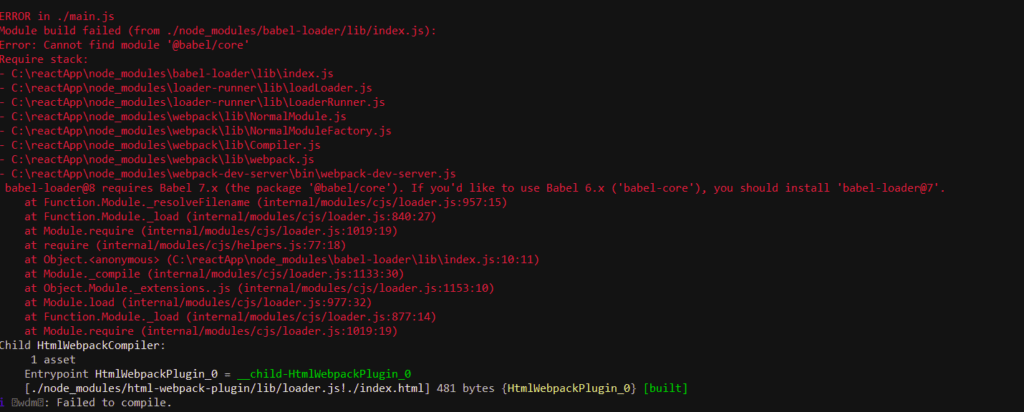
2. When babel core library fails due to babel loader incompatibility
You need to install the babel loader 7 version as per the below given error
App>npm install babel-loader@7 --save-dev
babel loader incompatible version
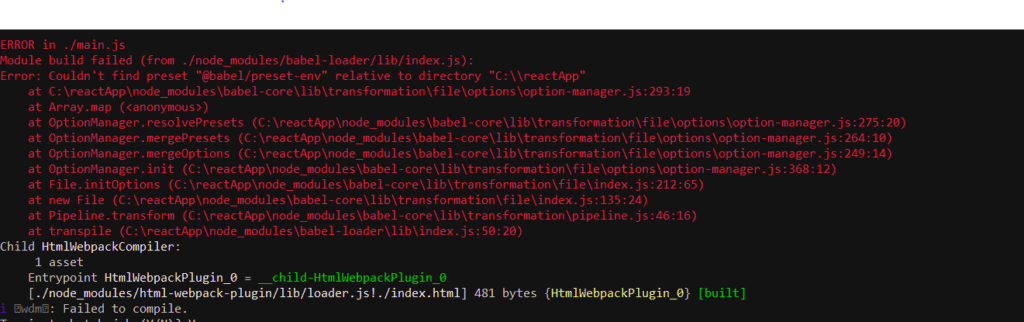
3. Error- couldn’t find preset “es2015” relative to directory
This means installation for “es205” is not on the machine. Execute the below command
npm install babel-preset-es2015
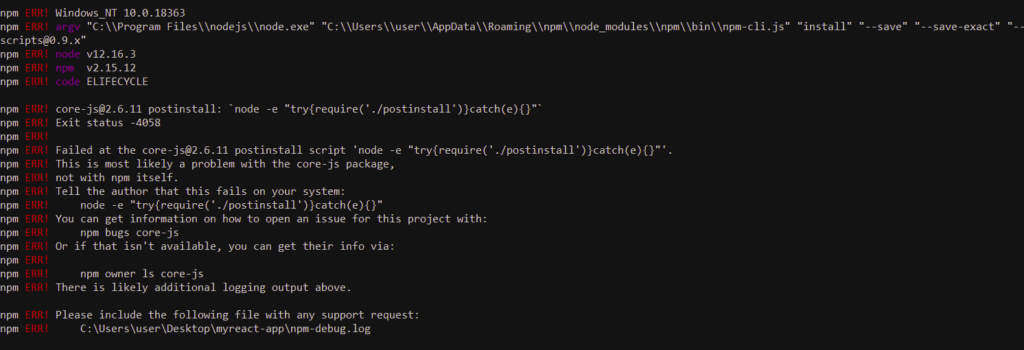
Common Errors while installing React using create-react-app
Ensure that your NPM version is 5 or above
core-js contains post install script which perfomrs the process via node -e call. It requires shell script which could be at different install path and thus fails. To resolve the issue , Execute the below command npm config set script-shell “C:\Program Files\git\bin\bash.exe” Now, re-run the create-react-app command for the React Installation
Creating First React Application
Let’s try our first “Hello World’ React Application.
Open the index.html file and add the below given code.
Open the main.js and add the below code. The Class HelloWorldApp needs to be mapped as the component in the main.js as the App Element.
import React from 'react';
import ReactDOM from 'react-dom';
import HelloWorldApp from './App.js';
ReactDOM.render(<App />, document.getElementById('app'));
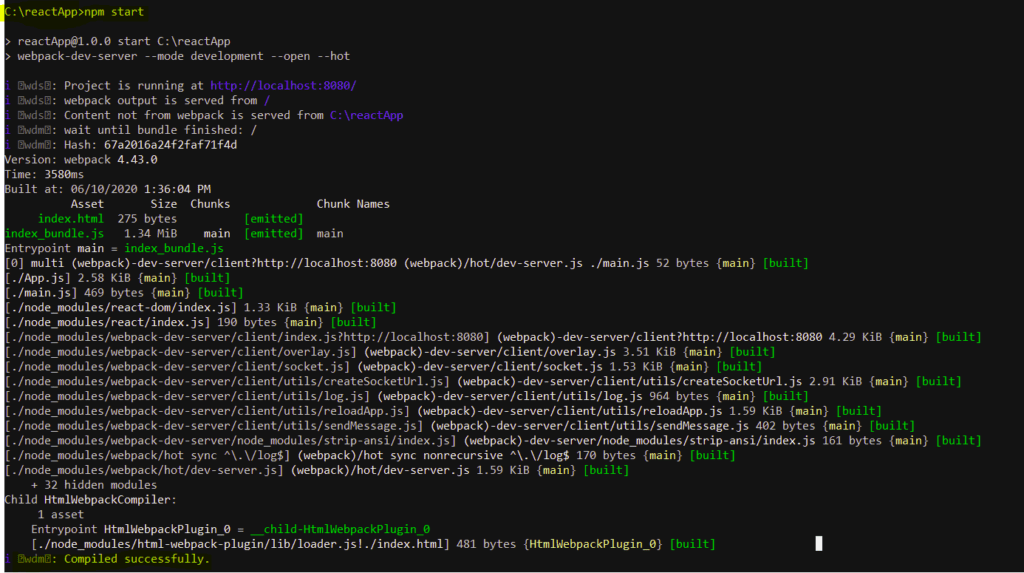
Execute React application
Run the command – npm start and you will be provided with the below details for the code compilation
The blog provides the ReactJS Overview , what is ReactJS, ReactJS features, ReactJS advantages and ReactJS limitations
Features of ReactJS
Below given are the features of ReactJS which makes it one of the most popular java script library.
ReactJS Feature Name
ReactJS Feature Description
License
React is licensed under Facebook Inc. (CC BY 4.0) and made it available to public in May 2013.
Declarative
React is declarative and allows to develop interactive UIs
JSX
JSX (JavaScript XML) is an extenstion to javascript which allows to write and add HTML elements into react. JSX Converts HTML tags into react elements.
Components
React provides component based javascript library which allows to split the code logic into small javascript functions maintaining the state and props and provides reusability.
Virtual DOM
React provides in-memory data structure termed as “Virtual DOM” to provide faster execution by updating the changed DOM Structure only instead of reloading complete DOM
Javascript expressions
provides support for javascript expressions
SEO Performance
React JS library helps in developing isomorphic applications using the server side rendering concept which increases the overall SEO performance.
Advantages of ReactJS
React is an open source java script library and easy to learn supported with good documentation.
Provide development of Rich UI features for both web based and mobile applications.
React is declarative and efficient
Provide easy code maintainability and reusable code with the usage of components feature.
React provides faster application execution with the use of Virtual DOM approach
Provide easy debugging as code is developed using java script.
React provides statefull components with the usage of state and props
React provides easy integration with the external plugins.
Disadvantages of ReactJS
Frequent changes in the ReactJS library makes it difficult for developers to keep upgrading with the features and makes it a on -going learning experience.
ReactJS covers the “View” part as part of the MVC Architecture and thus need to integrate with other frameworks for application development.
JSX being an extension to java script provides the conversion of html tags to react elements and this somehow makes it difficult for developers to understand the react functionality.