Start Oracle Database Listener in Windows

The Oracle Database listener starts with the Restart of the machine but somehow due to error or manually stopping the listener , we need to restart the Oracle Database Listener. The blog provides the steps to restart Oracle Database Listener in Windows 10

Starting and Stopping the Oracle XE Service in Windows

  1. Run -> services.msc to open the windows services dialog
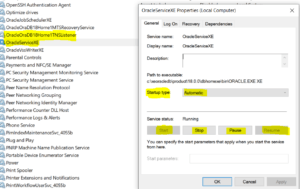
  2.  Search  for OracleServiceXE

Oracle XE Database Listener in windows


3.  Right -Click the OracleServiceXE and select the Option Start , Stop or Pause.

4. Right -Click the OracleServiceXE and select Properties -> Startup Type.  Select one of the below given options 

  • Automatic
  • Manual
  • Disabled from the Startup type list

Validate Oracle Database Connection after listener start 

  1. Navigate to the SQLPlus location in your Oracle Database 
<ORACLE_HOME>\product\18.0.0\dbhomeXE\bin

2. Connect SQL Plus for Database Connection 

Connect system / as sysdba 

3. Open the Pluggable Database XEPDB1 as it does not open automatically

SQL> ALTER PLUGGABLE DATABASE ALL OPEN;

SQL> ALTER PLUGGABLE DATABASE ALL SAVE STATE;

4. Stop the Running Oracle Database 

connect through the Sqlplus and execute the below command

SQL> SHUTDOWN IMMEDIATE


weblogic domain error Malformed argument has embedded quote

The below error encountered when try to create the integrated weblogic domain in Jdeveloper 12.2.1.4.0 ” Malformed argument has embedded quote”  , “java.io.IOException: Cannot run program “cmd.exe”

"C:\oraclesoabpm\oracle_common\common\bin\wlst.cmd" "C:\Users\user\AppData\Roaming\JDeveloper\system12.2.1.4.42.190911.2248\o.j2ee.adrs\BuildDefaultDomain1.py""
Cannot run program "cmd.exe" (in directory "C:\oraclesoabpm\oracle_common\common\bin"): Malformed argument has embedded quote: "C:\oraclesoabpm\oracle_common\common\bin\wlst.cmd" "C:\Users\user\AppData\Roaming\JDeveloper\system12.2.1.4.42.190911.2248\o.j2ee.adrs\BuildDefaultDomain1.py"
java.io.IOException: Cannot run program "cmd.exe" (in directory "C:\oraclesoabpm\oracle_common\common\bin"): Malformed argument has embedded quote: "C:\oraclesoabpm\oracle_common\common\bin\wlst.cmd" "C:\Users\user\AppData\Roaming\JDeveloper\system12.2.1.4.42.190911.2248\o.j2ee.adrs\BuildDefaultDomain1.py"
at java.lang.ProcessBuilder.start(ProcessBuilder.java:1048)
at oracle.jdevimpl.adrs.weblogic.wlst.ScriptRunnerImpl.runScript(ScriptRunnerImpl.java:106)
at oracle.jdevimpl.adrs.weblogic.builder.DomainScriptRunnerImpl.runScript(DomainScriptRunnerImpl.java:146)
at oracle.jdevimpl.adrs.weblogic.builder.DefaultDomainBuilder.createDomain(DefaultDomainBuilder.java:606)
at oracle.jdevimpl.adrs.weblogic.builder.DefaultDomainBuilder.build(DefaultDomainBuilder.java:274)
at oracle.jdevimpl.adrs.weblogic.builder.DefaultDomainBuilder$1.run(DefaultDomainBuilder.java:225)
at org.openide.util.RequestProcessor$Task.run(RequestProcessor.java:1443)
at org.netbeans.modules.openide.util.GlobalLookup.execute(GlobalLookup.java:68)
at org.openide.util.lookup.Lookups.executeWith(Lookups.java:303)
at org.openide.util.RequestProcessor$Processor.run(RequestProcessor.java:2058)

The below steps can be performed to resolve the Malformed argument issue.

  1. Navigate to the Jdeveloper 
<MW_HOME>\jdeveloper\ide\bin

2. Open the ide.conf file in the text editor . Enter the below given VM Argument details in the  OSGi configuration options

AddVMOption -Djdk.lang.Process.allowAmbiguousCommands=true

# Other OSGi configuration options for locating bundles and boot delegation.
#
AddVMOption -Dorg.eclipse.equinox.simpleconfigurator.configUrl=file:bundles.info
AddVMOption -Dosgi.bundles.defaultStartLevel=1
AddVMOption -Dosgi.configuration.cascaded=false
AddVMOption -Dosgi.noShutdown=true
AddVMOption -Dorg.osgi.framework.bootdelegation=*
AddVMOption -Dosgi.parentClassloader=app
AddVMOption -Dosgi.locking=none
AddVMOption -Dosgi.contextClassLoaderParent=app
AddVMOption -Djdk.lang.Process.allowAmbiguousCommands=true

3. Restart the JDeveloper . Run the Integrated weblogic domain again.

[Waiting for the domain to finish building...]
[10:29:28 AM] IntegratedWebLogicServer Domain is invalid. Regenerating it...
[10:29:30 AM] Creating IntegratedWebLogicServer Domain... [10:32:19 AM] Extending IntegratedWebLogicServer Domain...

ADRS_DOMAIN_PASSWORD error during Integrated Weblogic Domain creation

When tried to create the Integrated Weblogic Domain in JDeveloper , the below error encountered . This error occurs as Weblogic Jython libraries do not recognize the operating system. 

Error:  ADRS_DOMAIN_PASSWORD environment variable not set

The below given steps can be performed to resolve the error.

Option 1: 

Apply the Patch 22138883 as per the JDeveloper Version in your machine.

Option 2: 

Manual update the  jython-modules.jar 

  1. Copy the jython-modules.jar from the Oracle Fusion Middleware home path 
<MW_HOME>\wlserver\common\wlst\modules*

2. Unzip the  jython-modules.jar

3. Open the javashell.py file in the text editor 

4. Search for the variable _osTypeMap

_osTypeMap = (
  ( "nt", ( 'nt', 'Windows NT', 'Windows NT 4.0', 'WindowsNT',
  'Windows 2000', 'Windows 2003', 'Windows XP', 'Windows CE',
  'Windows Vista', 'Windows Server 2008', 'Windows 7', 'Windows 8',
  'Windows Server 2012')),
  ( "dos", ( 'dos', 'Windows 95', 'Windows 98', 'Windows ME' )),
  ( "mac", ( 'mac', 'MacOS', 'Darwin' )),
  ( "None", ( 'None', )),
  )

5. Update by adding “Windows 10” in the “nt”  values of _osTypeMap

 _osTypeMap = (
  ( "nt", ( 'nt', 'Windows NT', 'Windows NT 4.0', 'WindowsNT',
  'Windows 2000', 'Windows 2003', 'Windows XP', 'Windows CE',
  'Windows Vista', 'Windows Server 2008', 'Windows 7', 'Windows 8',
  'Windows Server 2012','Windows 10')),
  ( "dos", ( 'dos', 'Windows 95', 'Windows 98', 'Windows ME' )),
  ( "mac", ( 'mac', 'MacOS', 'Darwin' )),
  ( "None", ( 'None', )),
  )

6. Execute the below command to create the updated jython-modules.jar

jar –cvf jython-modules.jar

7. Place the new jython-modules.jar to the below middleware location

<MW_HOME>\wlserver\common\wlst\modules*

8. Now open the JDeveloper and try to create the integrated weblogic domain process. 


Add BPEL process service components to SOA composite

The blog provides the step to add a simple Hello World BPEL Process service components to SOA composite applications in the design environment.  

Let’s create a HelloWorld BPEL application to demonstrate the same. 

Add a New BPEL Service Component

File > New > Application

Select Applications -> SOA Application

Enter the Application Name and Click Next

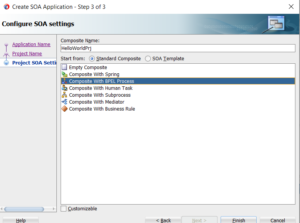
Configure SOA Settings -> Composite With BPEL Process

Hello world Composite Type

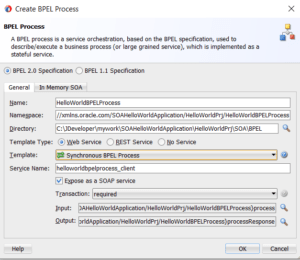
Hello world Synchronous BPEL Process

Click Finish

Template Types in BPEL Process Service Component

The Template Types allows to define what sort of BPEL Process Service Component is going to be exposed for the invocation.  It could be define as given below

  1. Web Service
  2. REST Service
  3. No Service

Template for BPEL Process Service Component

In the Create BPEL Process , user is provided with the option to select the template based on the BPEL Process Service Component.  The template creates the default files for <Process_Name>.bpel and <Process_Name>.wsdl where Process_Name is the Name given for the BPEL Process.  

BPEL Process Template files

Template Name Template Description
Asynchronous BPEL Process

Asynchronous BPEL Process does not wait for the reply to return .  Allows to create an Asynchronous BPEL Process with default Receive Activity. Add a Invoke Activity call back the client asynchronously 

Synchronous BPEL Process

An Synchronous BPEL Process waits for the reply to return to complete the service flow. 

Allows to create an synchronous BPEL Process  with default  Receive Activity. Add an reply activity to retrieve the results back.

One Way BPEL Process Allows to create the BPEL Process Service Component with one way call interface.
Define Service Later  Allows to create the BPEL Process Service Component with No activities.
Based on WSDL 

Allows to create the BPEL Process Service Component with an existing WSDL (Web Service).  

Need to define the WSDL URL, Port Type and Callback Port.

Subscribed to Events

Allows to create the BPEL Process Service Component  for subscribing to an Business Event.  

This requires event selection which needs to be subscribed, consistency level and if this event need to be published or not. 

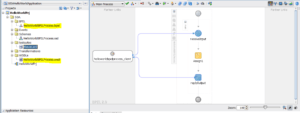
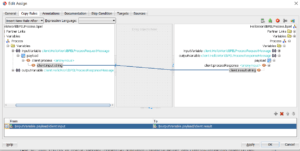
Now Lets create a Assign Activity to map the Client Input with the Response Output String to perform the basic transformation. Assing Activity Mapping

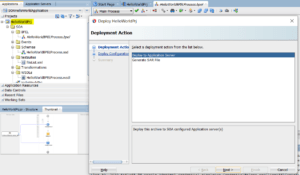
Deploy the BPEL Service to Integrated SOA Server 

Deploy Hello world to Application Server

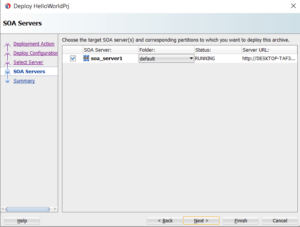
hello world deployment to soa serverhello world deployment to soa server

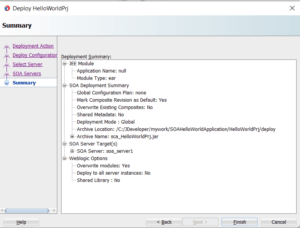
Hello World Deployment Summary

Test Hello World BPEL Web Service 

  1. Log into the SOA Server 
  2. Click on Deployed Composites -> BPELHelloWorldV1.0
  3. Click on Test Button 
  4. Enter the Input String as “Hello World”
  5. Click on Test Web Service 
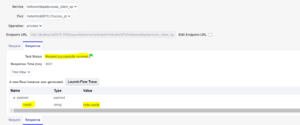
  6. Web Service returns the “Hello World” as result string.

Test Hello world web service


Oracle Fusion Middleware 12c Infrastructure installation guide

The Oracle SOA generic installer for Oracle Fusion Middleware SOA Suite 12c includes Oracle WebLogic Server and Oracle Coherence support whereas the Oracle Fusion Middleware Infrastructure provides the Fusion Middleware Control and Java Required Files (JRF) for managing Multitenant domains with multiple partitions.  The blog provides the step by step installation for Oracle Fusion Middleware 12c Infrastructure. 

Pre-requisites for Oracle Fusion Middleware Infrastructure

  1. The  Oracle Fusion Middleware Infrastructure Installer can be downloaded from Oracle Site Oracle Fusion Middleware Infrastructure Download Link 
  2. Ensure that the Oracle Fusion Middleware SOA Suite 12c is already installed on your local machine.
  3. Minimum RAM available should be 4 GB
  4. Physical Memory allocation available should be 2 GB 

Oracle Fusion Middleware Infrastructure Installation Steps

Go to the Directory where the Oracle Fusion Middleware Infrastructure Installer is downloaded and then Extracted.

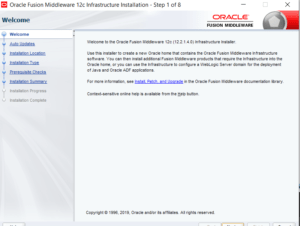
Execute the setup and it opens the Infrastructure installation welcome screen. 

SOA12c Infrastructure setup

Skip for Auto Updates

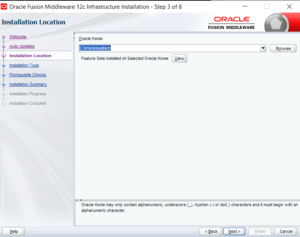
Provide the directory for Oracle Fusion Middleware Infrastructure Installation . It should be installed in the same directory where your SOA Suite is installed with Weblogic Server.

Fusion Middleware Infrastructure location

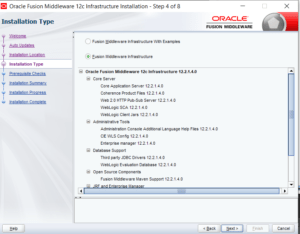
Provide the Installation Type

Fusion Middleware Infrastructure installation type

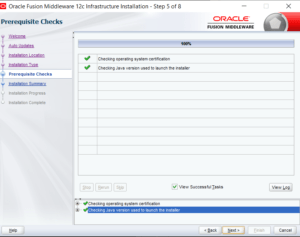
Perform the Prerequisite check for the installation

Fusion Middleware Infrastructure-installation prereqisite

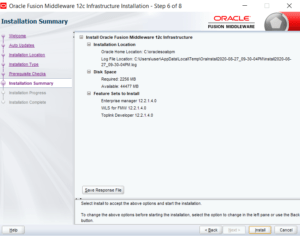
Next Screen shows the Fusion Middleware Infrastructure Installation Summary Details

Fusion Middleware Infrastructure installation summary

The Installation Progress Screen

Fusion Middleware Infrastructure installation progress

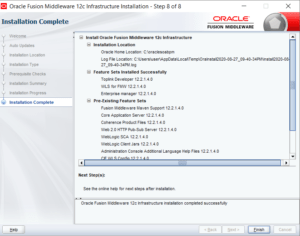
The below screen shows the completion of Fusion Middleware Infrastructure Installation Process

Fusion Middleware Infrastructure installation completed


SOA 12c RCU installation error RCU-6080 Global prerequisite check failed

The blog provides the resolution for the common error like  RCU-6002 Prerequisite validation failed and  RCU-6080 Global prerequisite check failed for the specified database while installing the SOA Schemas using Repository Creation Utility in the Oracle Database.  

ERROR – RCU-6002 Prerequisite validation failed

The below could be the possible reason for the prerequisite validation failed

  1. Identify SOA 12c suported Databases: Identify the Supported Databases for SOA Suite 12c before proceeding with the Database installation. The SOA 12c Certification Matrix can be found on the Oracle Link  Oracle SOA 12c Certification Matrix under the section  Oracle Fusion Middleware 12c Certifications -> System Requirements and Supported Platforms for Oracle Fusion Middleware 12c (12.2.1.4.0).xls
  2. No Execute Privileges: MDS database user created by Repository Creation Utility (RCU) does not have  EXECUTE privilege on DBMS_OUTPUT, DBMS_STATS, and DBMS_LOB. Log into the Oracle Database as SYSDBA and GRANT  EXECUTE Privileges to the MDS User. 

ERROR – RCU-6080 Global prerequisite check failed for the specified database

Cause for the Error – ” The selected Oracle database is a multitenant container database (CDB). Connecting to a multitenant container database (CDB) is not supported. Connect to a valid pluggble database (PDB)”  

Before we execute the Repository Creation Utility, the following validations need to be performed

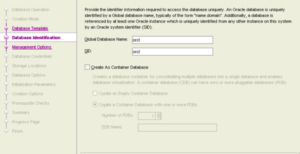
  1.  Do not Select Container Database: While installing the Oracle Database ensure that the Container Database Checkbox is not selected. 

Oracle Database Identification

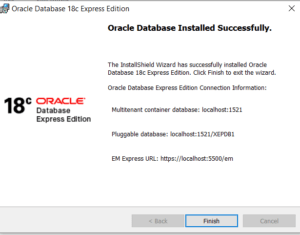
2. Pluggable Database must be installed: The Oracle Database installs the Pluggable Database (PDB) which is to be used while installing RCU.  The below screen shows the XEPDB1 PDB created by the Oracle Database Installer.  Save this information as it is to be provided when providing Database details for loading SOA Schema

Oralce XE Pluggable Database

3. Oracle Database Validations:  Before we proceed with the RCU Setup, the below given SQLs can be useful to validate the installed Oracle Database. 

Validate if the Database is created as CDB or not

SELECT CDB FROM V$DATABASE; 

CDB
----
YES

Retrieve the installed Pluggable Database . In our case , the PDB XEPDB1 exists. 

SELECT CON_ID, NAME, OPEN_MODE FROM V$PDBS;

CON_ID NAME OPEN_MODE
2 PDB$SEED READ ONLY
3 XEPDB1 READ WRITE

Retrieve the Service Name for the Pluggable Database  XEPDB1

select name from v$services;

name
---
SYS$BACKGROUND
SYS$USERS
xepdb1


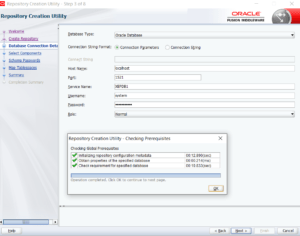
Provide the Oracle Database Connection details in RCU Database Connection Screen with Service Name as XEPDB1

Oracle Database connection details


Java VM Initialization error: could not reserve Space For Object Heap

The blog discusses the Java VM Initialization error while running the Weblogic Server. 

Error occurred during initialization of VM
Could not reserve enough space for object heap

The error is an JVM error and encountered when the Java Process cannot create the Virtual machine at run time due to limitations on the Heap Size for memory allocations.  Heap Size is the memory allocation for storing java object at run time. The Heap Size values can be managed though Xmx and Xms VM arguments. 

The below could be the reason for object heap error

  1. The  heap size is not defined to be allocated for the memory
  2. Installed 32 bit JVM in 64 bit machine
  3. The provided heap size -Xmx value is defined too high than to be allocated as per 32- bit VM.
  4. The provided heap size -Xmx value is defined too less than to be allocated as per 32- bit VM.
  5. The provided heap size -Xmx value more than the available physical memory. 

The heap size values will differ based on below configurations

  1. Operating system 32-bit machine or 64-bit machine.
  2. JVM 32/64 bit version
  3. hardware architecture

Identify the Current Heap Size 

In case of Weblogic Server, the server start provides the Java Memory arguments for heap size 

Java VM Initialization error

Modify the Java Heap Size memory arguments

Update the Java memory arguments by performing the below action

Linux: 

 -bash-3.2$ export _JAVA_MEMORY_OPTIONS =”-Xmx512M”

Windows: 

Update the Windows Environment Variables

Increase Java Heap Size

Updating Heap Size for Weblogic Server running SOA

In case the above error is coming while running weblogic server or the managed server like soa_server1 , then you can update the Heap Size Memory allocation in the Environment variable using USER_MEM_ARGS which overrides the value for MEM_ARGS in the setDomainEnv.cmd file of the weblogic domain.

weblogic User Memory arguments

Updating Heap Size from Weblogic Server Console

Perform the below given steps:

  1. Log into the weblogic server console
  2. Click on Servers
  3. Select the Server for which changes need to be done.  (AdminServer) 
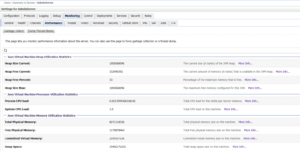
  4. Click on Monitoring -> Performance Tab
  5.  Update the Heap Size values.

Weblogic console heap size allocation

Restart the Weblogic Server and memory issue should be resolved now.


Oracle SOA Suite 12c 12.2.1.4.0 quickstart installation guide

Oracle SOA 12c 12.2.1.4.0 is the Oracle Fusion Middleware Product from Oracle technologies. Oracle provides the Oracle SOA Suite 12c quickstart installer for the learning and evaluation purpose.  The blog provides the SOA 12c step by step installation process on Windows 10 for the beginners.   The complete list of SOA 12c Hardware and Software requirements can be referred on the Oracle Link  Oracle SOA 12c Certification Matrix under the section  Oracle Fusion Middleware 12c Certifications -> System Requirements and Supported Platforms for Oracle Fusion Middleware 12c (12.2.1.4.0).xls

Software requirements for SOA 12c installation: 

  1. Download JDK 1.8 from the Oracle Java download link  Oracle JDK1.8 download Windows X64 and install on your local machine.
  2. Set up the JAVA_HOME in the Environment Variables.
  3. Install Oracle 12c Database from the Oracle site link  Oracle 12c Database Download
  4. Ensure that Oracle SOA 12c quickstart is currently supported for Windows 64 bit and thus need to be installed on Windows 7 / Windows 10 64-bit machines only.
  5. Download the SOA12c 12.2.14.0 from the Oracle Software Delivery Cloud Oracle SOA 12c Download Link
Download Oracle SOA 12c  from Delivery Cloud
Download Oracle SOA 12c from Delivery Cloud

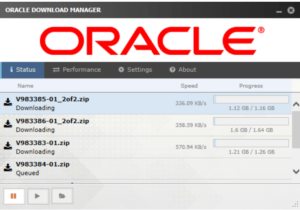
Download V983385-01_1of2.zip and V983385-01_2of2.zip  for Oracle Fusion Middleware 12c (12.2.1.4.0) SOA Quick Start for (Microsoft Windows x64 (64-bit) using the Oracle Download Manager. 

Oracle SOA 12c Download Manager

Hardware requirements for SOA 12c installation: 

Hardware Requirement  Memory Allocation
SOA Server 3 GB (Minimum)
OSB Server 3 GB (Minimum)
Weblogic Server 3 GB (Minimum)
Operating System and Other Software 3 GB 
Swap Memory 2 GB
Temp Memory 3 GB to 5 GB
RAM  4 GB (Minimum) , recommended 8 GB

SOA 12c Installation Process with Screenshots:

Open the Command Prompt and Run it as Administrator

Open the folder where quick start installer are being downloaded and extracted

Execute the below command in the Command Prompt 

%JAVA_HOME%\bin\java.exe -jar fmw_12.2.1.4.0_soa_quickstart.jar

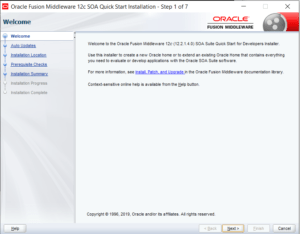
The Installer opens the SOA 12c quickstart installation window

SOA 12c quickstart installation welcome screen

Skip the Auto Update Screen 

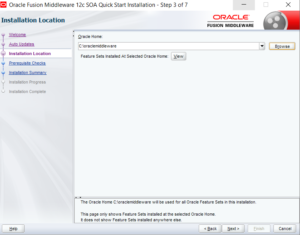
Enter the directory location for the SOA 12c Installation 

SOA12c installation location

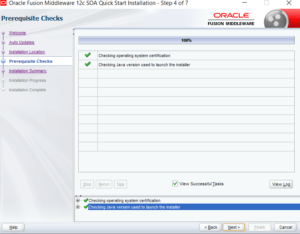
The next screen provides the Installation pre-requisite check performed 

SOA12c installation prerequisite check

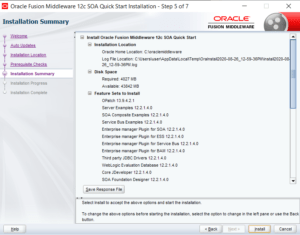
The below screen provides the SOA 12c Installation summary details 

SOA12c installation summary

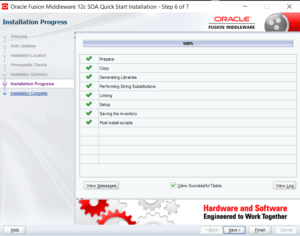
Installation Progress Screen

SOA12c installation progress

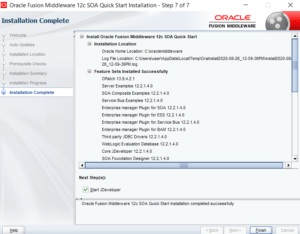
Installation Completion Screen

SOA12c installation complete

JDeveloper 12c SDK Extension Update

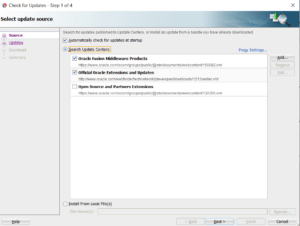
Open the Installed JDeveloper and click Help-> Check for Updates. The latest available updates are shown.

Jdeveloper Update Screen

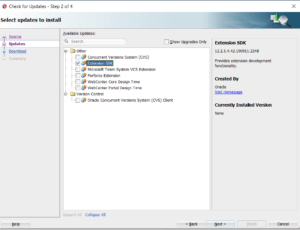
Click Next and Select the SDK Extensions for the JDeveloper

Jdeveloper SDK extensions

Click Next and then Finish to get the updates installed for JDeveloper. You might need Restart for the JDeveloper get the changes reflected.

How to Install Oracle XE 18c Database 

Perform the steps provided in the below given blog for Oracle XE 18c Database Installation Oracle XE 18c Installation Steps

Repository Creation Utility (RCU)

The repository creation utility (RCU) is provided to CREATE the SOA Schema which is consumed by the SOA Services. The SOA Composite details will be residing in this schema. The SOA 12c installer provides the RCU Windows batch program to install the SOA Schema. The below given is the step by step installation process for RCU. 

Pre-requisites for the RCU

  1. Supported Database should be installed in your local machine
  2. 4 GB Memory allocation required for Oracle Database
  3. SOA12c Software Installation is completed in your local machine

Navigate to the SOA Directory at the below given path and execute the Config batch in the command prompt as Administrator.

<SOA12c_Directory_Location>\oracle_common\common\bin\config.bat

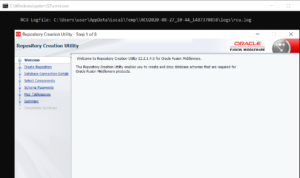
The Repository Creation Utility (RCU) Welcome Screen is opened

SOA12c RCU Setup Screen

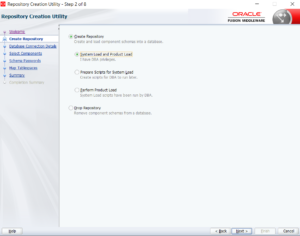
Select the RCU Creation Type 

SOA12c RCU Repository Creation Screen

Enter the Oracle Database Connection details 

Oracle Database connection details

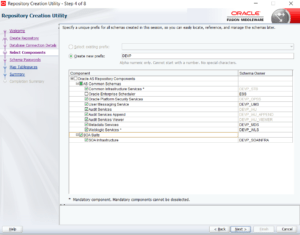
Select the SOA Component that need to be installed using RCU

RCU component selection

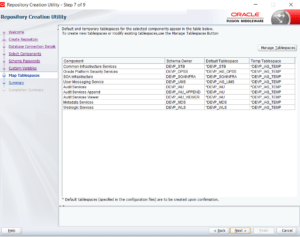
RCU Tablespace Mapping Verification Screen. 

RCU Tablespace Mapping

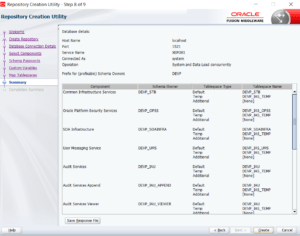
RCU Schema and Tablespace Summary Screen

RCU Schema & Tablespace Summary

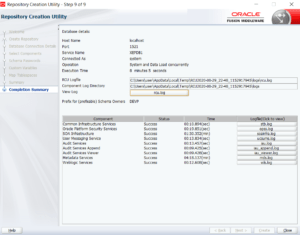
RCU Successful Completion Screen

RCU Successful Completion Screen


Oracle XE 18c Database installation guide

The blog provides the step by step installation process for installing the Oracle XE 18c Database in your local machine. The Oracle XE 18c Database can be downloaded from the Oracle Site Link Oracle XE 18c Database Download Link

Pre-requisite for the Oracle XE 18c

  1. RAM: 4 GB  
  2. Oracle XE Memory allocation : 4 GB
  3. Swap Memory : 2 GB
  4. Temp : 2 GB

Open the Directory where Oracle XE 18c Database is downloaded and extracted.  

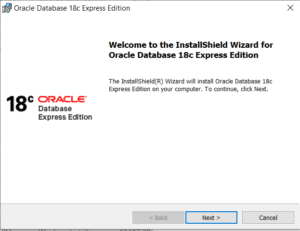
Execute the Setup.exe file and it opens the Oracle XE Installation Welcome Screen.

Oracle XE18c Database Installation Wizard

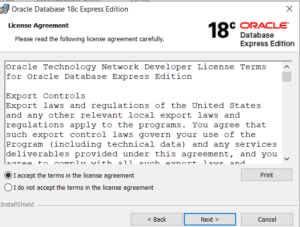
Accept the User Agreement for Oracle XE 18c 

Oracle XE 18c Database License Agreement

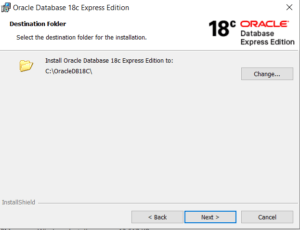
Select the Installation Directory where Oracle XE 18c Database to be installed

Oracle XE 18c Database Install Path

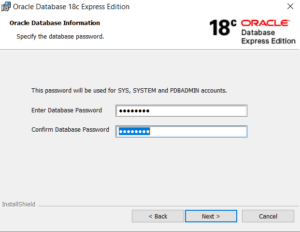
Enter the Password for the Oracle XE 18c Database 

Oracle XE 18c Database system password

Click Next and Oracle Database installation to be completed. 

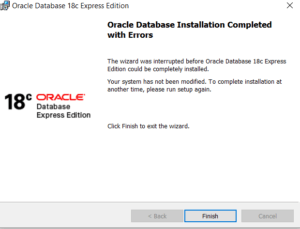
Oracle XE 18c Database Installation completed

Click Finish to close the setup 

SQL Developer Connection with Oracle Database

The SQL Developer can be downloaded from Oracle site SQL Developer Download link

Install the SQL Developer in your machine and open it.

Go to Oracle connections , right -click -> New Connection

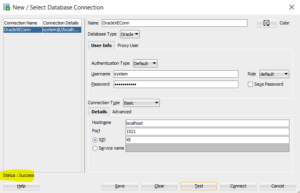
Enter the Oracle Database details as shown in the screen

SQL Developer Connection with Oracle XE Database

Test the Connection. 

Click Close.  You are now ready to execute oracle commands using SQL Developer.


mongodb how to delete document in a collection ?

The blog provides the steps how to delete documents from collection in mongodb. A record or document in mongodb is removed or deleted using deleteOne() , deleteMany(), remove() and findOneAndDelete() methods which we will discuss in detail with examples.

Delete Document in MongoDB

The below needs to be considered when delete a document in MongoDB

  • MongoDB allows to delete a single document in the collection
  • MongoDB allows to delete multiple documents in the collection
  • MongoDB allows to delete a document by _id
  • MongoDB allows to delete a document based on sort criteria

  MongoDB provides the below given methods for deleting a document in a collection.

S. No Delete Method Delete Method Description
1 db.collection.deleteOne() allows to delete a single document in a collection that matches the delete criteria
2 db.collection.deleteMany() allows to delete multiple document in a collection that matches the delete criteria
3 db.collection.remove() allows to delete a single document or multiple document in a collection that matches the delete criteria
4 db.collection.findOneAndDelete() allows to delete a single document in a collection that matches the delete criteria  and sort criteria


Method Name – deleteOne()

Syntax – db.collection.deleteOne(<DELETE_CRITERIA>)

Example: Retrieve the existing documents from the collection oracleappsUsers

> db.oracelappsUsers.find()
{ "_id" : ObjectId("5f13c9df9104ecc5b2149d60"), "name" : "Amit Trivedi", "userType" : "Admin", "description" : "MongoDB insert document sample", "createdBy" : "oracelappshelp.com" }
{ "_id" : ObjectId("5f13ce54a3587b86324785d9"), "name" : "Rohit Verma", "userType" : "Admin", "description" : "MongoDB insert document Tutorial", "createdBy" : "oracelappshelp.com" }
{ "_id" : ObjectId("5f13ce7ca3587b86324785da"), "name" : "Mohit Sharma", "userType" : "Admin", "description" : "MongoDB insert document sample", "createdBy" : "oracelappshelp.com" }

Now, delete a single document by executing the below delete document command

> db.oracelappsUsers.deleteOne( { name: "Rohit Verma" } )
{ "acknowledged" : true, "deletedCount" : 1 }

Now, Retrieve the available documents from the collection – oracleappsUsers. It will list down 2 documents only.

> db.oracelappsUsers.find()
{ "_id" : ObjectId("5f13c9df9104ecc5b2149d60"), "name" : "Amit Trivedi", "userType" : "Admin", "description" : "MongoDB insert document sample", "createdBy" : "oracelappshelp.com" }
{ "_id" : ObjectId("5f13ce7ca3587b86324785da"), "name" : "Mohit Sharma", "userType" : "Admin", "description" : "MongoDB insert document sample", "createdBy" : "oracelappshelp.com" }

Method Name – deleteMany()

Syntax – db.collection.deleteMany(<DELETE_CRITERIA>)

Example: Retrieve the existing documents from the collection oracleappsUsers

> db.oracelappsUsers.find().pretty()
{
"_id" : ObjectId("5f12fd48d4a587e31cddd7e5"),
"name" : "Mohit Sharma",
"userType" : "Administrator",
"description" : "MongoDB insert document sample",
"createdBy" : "oracelappshelp.com"
}
{
"_id" : ObjectId("5f130f1c3a96070d59afd2c0"),
"name" : "Rohit Verma",
"userType" : "Administrator",
"description" : "MongoDB insert document Tutorial",
"createdBy" : "oracelappshelp.com"
}

Now, delete all the documents from the collection where userType =’Admin’ which results into deletion of multiple documents

> db.oracelappsUsers.deleteMany( { userType: 'Administrator' } )
{ "acknowledged" : true, "deletedCount" : 2 }

Now execute the find() to get the document details. There should not be any document available in the collection.

> db.oracelappsUsers.find().pretty()

Method Name – remove()

Syntax – db.collection.remove(<delete_criteria>, justOne)

where

delete_criteria – is the deletion condition that need to be applied to the document

justOne – is the Boolean value when enabled, allows to delete only 1 document based on delete criteria

The remove() allows to delete a single document or multiple document that matches the delete criteria. The remove() returns an object with the status of the operation

Example: Add New records. Retrieve the existing documents from the collection oracleappsUsers

> db.oracelappsUsers.find()
{ "_id" : ObjectId("5f1546f5b5a69e08eec889b5"), "name" : "Mohit Sharma", "userType" : "Administrator", "description" : "MongoDB insert document sample", "createdBy" : "oracelappshelp.com" }
{ "_id" : ObjectId("5f15470db5a69e08eec889b6"), "name" : "Ashish Goyal", "userType" : "Subscriber", "description" : "MongoDB insert document Tutorial", "createdBy" : "oracelappshelp.com" }
{ "_id" : ObjectId("5f154722b5a69e08eec889b7"), "name" : "Praveen Gupta", "userType" : "Subscriber", "description" : "MongoDB insert document Tutorial", "createdBy" : "oracelappshelp.com" }

Now execute the remove() to remove the user with name -“Praveen Gupta”

> db.oracelappsUsers.remove({"name":"Praveen Gupta"})
WriteResult({ "nRemoved" : 1 })

Execute the find() to retrieve the available documents from the collection

> db.oracelappsUsers.find()
{ "_id" : ObjectId("5f1546f5b5a69e08eec889b5"), "name" : "Mohit Sharma", "userType" : "Administrator", "description" : "MongoDB insert document sample", "createdBy" : "oracelappshelp.com" }
{ "_id" : ObjectId("5f15470db5a69e08eec889b6"), "name" : "Ashish Goyal", "userType" : "Subscriber", "description" : "MongoDB insert document Tutorial", "createdBy" : "oracelappshelp.com" }

If we need to remove all the documents from the collection then we can execute the below given command. This method execution is similar to TRUNCATE Table SQL in RDBMS where all records will be removed.

> db.oracelappsUsers.remove({})

Method Name – findOneAndDelete()

Syntax – db.collection.findOneAndDelete(<delete_criteria>, justOne)

The findOneAndDelete() allows to delete the document based on the delete criteria and sort criteria and returns the deleted document

db.collection.findOneAndDelete(
   <filter>,
   {
     projection: <document>,
     sort: <document>,
     maxTimeMS: <number>,
     collation: <document>
   }
)
Parameter Parameter Type Parameter Description
filter Document depicts the delete criteria
projection Document depicts the sub set of fields to return
sort Document specifies the sorting order matched as per the filter.
maxTimeMS Number specifies the time for the operation to complete
collation Document allows to specify language-specific rules for string comparison

How to update mongodb document in a collection ?

The tutorial provides the steps to update the document in MongoDB. A record or document is updated in mogodb using update() , updateOne(), updateMany(), replaceOne() which we will discuss in details with examples

Update Document in MongoDB

The below needs to be considered when updating a document in MongoDB

  • MongoDB allows to update a single document in the collection
  • MongoDB allows to update multiple documents in the collection
  • MongoDB allows to replace a single document in the collection
S. No MongoDB Update Methods Update Method Description
1 db.collection.update() The method updates a single document or multiple document which matches the given update criteria
2 db.collection.updateOne() The method updates a single document which matches the given update criteria
3 db.collection.updateMany() The method updates multiple document or multiple document which matches the given update criteria
4 db.collection.replaceOne() The method replaces a single document which matches the given update criteria
5 db.collection.findOneAndReplace() The method replaces a single document which matches the given update criteria
6 db.collection.findOneAndUpdate() The method updates a single document which matches the given update and sorting criteria
7 db.collection.findAndModify() The method modifies and return the single document. This method is useful when need to return the document with the modifications on the update. By default return document does not provide any details on modification being done.
8 db.collection.save() This method allows to insert new document or update the existing document.
9 db.collection.bulkWrite() This method includes Array parameter to allow multiple write operation with the order of execution.

Method Name: update()

Syntax: db.collection.update(<Update_Criteria>,<update>)

The db.collection.update() methods allows to update a single document or multiple documents in a collection.

Example: Retrieve the existing record from the collection – oracleappsUsers

> db.oracelappsUsers.findOne({name: "Mohit Sharma"})
{
"_id" : ObjectId("5f12fd48d4a587e31cddd7e5"),
"name" : "Mohit Sharma",
"userType" : "Admin",
"description" : "MongoDB insert document sample",
"createdBy" : "oracelappshelp.com"
}

Now update the userType from “Admin” to “Administrator”

> db.oracelappsUsers.update({'userType':'Admin'},{$set:{'userType':'Administrator'}})
WriteResult({ "nMatched" : 1, "nUpserted" : 0, "nModified" : 1 })

Now Retrieve the same record and userType should be updated to ‘Administrator’

db.oracelappsUsers.findOne({name: "Mohit Sharma"})
{
"_id" : ObjectId("5f12fd48d4a587e31cddd7e5"),
"name" : "Mohit Sharma",
"userType" : "Administrator",
"description" : "MongoDB insert document sample",
"createdBy" : "oracelappshelp.com"
}

Method Name: updateOne()

Syntax: db.collection.updateOne(<Update_Criteria>,<update>, <options>)

The updateOne() allows MongoDB to update a single document in a collection.

Example: Create a new record in collection – oracleappsUsers

> db.oracelappsUsers.insert({
… name: "Amit Srivastava",
… userType: "subscriber",
… description: "MongoDB insert document sample",
… createdBy: "oracelappshelp.com"
… })
WriteResult({ "nInserted" : 1 })

Now Retrieve the inserted document using findOne( )

> db.oracelappsUsers.findOne({name: "Amit Srivastava"})
{
"_id" : ObjectId("5f13c9df9104ecc5b2149d60"),
"name" : "Amit Srivastava",
"userType" : "subscriber",
"description" : "MongoDB insert document sample",
"createdBy" : "oracelappshelp.com"
}

Now , update the record name from ‘Amit Srivastava’  to ‘Amit Trivedi’ using updateOne()

> db.oracelappsUsers.updateOne(
… {name: 'Amit Srivastava'},
… { $set: { name: 'Amit Trivedi'}}
… )
{ "acknowledged" : true, "matchedCount" : 1, "modifiedCount" : 1 }

Retrieve the updated document result

db.oracelappsUsers.findOne({name: "Amit Trivedi"})
{
"_id" : ObjectId("5f13c9df9104ecc5b2149d60"),
"name" : "Amit Trivedi",
"userType" : "subscriber",
"description" : "MongoDB insert document sample",
"createdBy" : "oracelappshelp.com"
}

Method Name: updateMany()

Syntax: db.collection.updateMany(<Update_Criteria>,<update>, <options>)

The method updateMany() allows MongoDB to update multiple documents in a collection.

Example: Retrieve the list of document in a collection using find()

> db.oracelappsUsers.find().pretty()
{
"_id" : ObjectId("5f13c9df9104ecc5b2149d60"),
"name" : "Amit Trivedi",
"userType" : "subscriber",
"description" : "MongoDB insert document sample",
"createdBy" : "oracelappshelp.com"
}
{
"_id" : ObjectId("5f13ce54a3587b86324785d9"),
"name" : "Rohit Verma",
"userType" : "subscriber",
"description" : "MongoDB insert document Tutorial",
"createdBy" : "oracelappshelp.com"
}
{
"_id" : ObjectId("5f13ce7ca3587b86324785da"),
"name" : "Mohit Sharma",
"userType" : "subscriber",
"description" : "MongoDB insert document sample",
"createdBy" : "oracelappshelp.com"
}

Now Update the userType from ‘Subscriber’ to ‘Admin’ using updateMany()

> db.oracelappsUsers.updateMany(
… {userType: 'subscriber'},
… { $set: { userType: 'Admin'}}
… )
{ "acknowledged" : true, "matchedCount" : 3, "modifiedCount" : 3 }

Retrieve the updated documents from the collection

> db.oracelappsUsers.find().pretty()
{
"_id" : ObjectId("5f13c9df9104ecc5b2149d60"),
"name" : "Amit Trivedi",
"userType" : "Admin",
"description" : "MongoDB insert document sample",
"createdBy" : "oracelappshelp.com"
}
{
"_id" : ObjectId("5f13ce54a3587b86324785d9"),
"name" : "Rohit Verma",
"userType" : "Admin",
"description" : "MongoDB insert document Tutorial",
"createdBy" : "oracelappshelp.com"
}
{
"_id" : ObjectId("5f13ce7ca3587b86324785da"),
"name" : "Mohit Sharma",
"userType" : "Admin",
"description" : "MongoDB insert document sample",
"createdBy" : "oracelappshelp.com"
}

Method Name: findOneAndReplace()

Syntax:

db.collection.findOneAndReplace(
   <filter>,
   <replacement>,
   {
     projection: <document>,
     sort: <document>,
     maxTimeMS: <number>,
     upsert: <boolean>,
     returnNewDocument: <boolean>,
     collation: <document>
   }
)
Parameter Parameter Type Parameter Description
filter Document depicts the update criteria
replacement Document depicts the document to be replaced but cannot contain Update Operators
projection Document depicts the sub set of fields to return
sort Document specifies the sorting order matched as per the filter.
maxTimeMS Number specifies the time for the operation to complete
upsert Boolean

Default value is False. Replaces the document with the matched filter and returns returnNewDocument  as true .

If does not match replacement, then insert as new document and returns Null.

returnNewDocument Boolean returns the replacement document instead of the original document
collation Document allows to specify language-specific rules for string comparison

Method Name – save()

This method allows to insert new document or update the existing document. This method is deprecated in MongoDB.

Syntax

> db.collection.save(
  <document>,
  {
    writeConcern:<document>
  }
)

Example:

> db.orders.save( { item: "Laptop", qty: 10 , price:4000, status:"Processed" } )

Update Operators in MongoDB

The below given are the update operators in MongoDB.

S. No  Operator Name Operator Description
1 $currentDate set the value of a field to current date as or TimeStamp
2 $inc increments the value
3 $min updates the document when provided value is less than the existing field value
4 $max updates the document when provided value is greater than the existing field value
5 $mul allows to multiply the field value
6 $rename renames the field in a document
7 $set set the value of a field in a document
8 $setOnInsert set the value of a field for the new document
9 $unset removes the value of a field in a document


How to query mongodb Document in a collection ?

The tutorial provides the different methods available to Query document in MongoDB collection. A document can be read or queried in mongodb using find() , findOne(), pretty() methods which we will discuss in detail with examples.

Query document methods in MongoDB

Method Name – find() :

Syntax: > db.collectionName.find()

The find() method is the basic method to query the document in a collection. This method lists down all the documents available in a collection.

Insert the document in the Collection – oracleappsUsers

> db.oracelappsUsers.insert({
… name: "Rohit Verma",
… userType: "Subscriber",
… description: "MongoDB insert document Tutorial",
… createdBy: "oracelappshelp.com"
… })
WriteResult({ "nInserted" : 1 })

Query the document with find () in the collection – oracleappsUsers. It will list down all the available documents.

> db.oracelappsUsers.find()
{ "_id" : ObjectId("5f12fd48d4a587e31cddd7e5"), "name" : "Mohit Sharma", "userType" : "Admin", "description" : "MongoDB insert document sample", "createdBy" : "oracelappshelp.com" }
{ "_id" : ObjectId("5f130f1c3a96070d59afd2c0"), "name" : "Rohit Verma", "userType" : "Subscriber", "description" : "MongoDB insert document Tutorial", "createdBy" : "oracelappshelp.com" }

Method Name – pretty

Syntax – >db.collectionName.find().pretty()

The pretty() method is allowed to format the Query document result. The below given is the example for find().pretty()

> db.oracelappsUsers.find().pretty()
{
"_id" : ObjectId("5f12fd48d4a587e31cddd7e5"),
"name" : "Mohit Sharma",
"userType" : "Admin",
"description" : "MongoDB insert document sample",
"createdBy" : "oracelappshelp.com"
}
{
"_id" : ObjectId("5f130f1c3a96070d59afd2c0"),
"name" : "Rohit Verma",
"userType" : "Subscriber",
"description" : "MongoDB insert document Tutorial",
"createdBy" : "oracelappshelp.com"
}

Method Name – findOne()

Syntax – >db.collectionName.findOne(<search_attribute>)

The findOne() method in MongoDB allows to query a single document by providing the document attribute details. The below given example depicts the usage of findOne() to query document in a collection.

> db.oracelappsUsers.findOne({name: "Mohit Sharma"})
{
"_id" : ObjectId("5f12fd48d4a587e31cddd7e5"),
"name" : "Mohit Sharma",
"userType" : "Admin",
"description" : "MongoDB insert document sample",
"createdBy" : "oracelappshelp.com"
}

Query Operators in MongoDB

RDBMS provides various operators to retrieve the data based on specified conditions like Where , <= , >= , AND , OR

MongoDB provides the RDBMS equivalent operators to query the document in a collection.

S. No RDBMS Search Data Query MongoDB Query Document
1 SELECT * from Orders db.orders.find( {} )
2 SELECT * FROM orders WHERE status = “COMPLETED” db.orders.find( { status: “COMPLETED” } )
3 SELECT * FROM orders WHERE status in (“INPROGRESS”, “PENDING”) db.orders.find( { status: { $in: [ “INPROGRESS”, “PENDING” ] } } )
4 SELECT * FROM orders WHERE status = “PENDING” AND price < 2000 db.orders.find( { status: “PENDING”, price: { $lt: 2000 } } )
5 SELECT * FROM orders WHERE status = “PENDING” OR price < 2000 db.orders.find( { $or: [ { status: “PENDING” }, { price: { $lt: 2000 } } ] } )
6 SELECT * FROM orders WHERE status = “PENDING” AND ( price < 3000 OR item LIKE “Laptop%”) db.orders.find( {
status: “PENDING”,
$or: [ { price: { $lt: 3000 } }, { item: /^Laptop/ } ]
} )