Oracle SOA 12c 12.2.1.4.0 is the Oracle Fusion Middleware Product from Oracle technologies. Oracle provides the Oracle SOA Suite 12c quickstart installer for the learning and evaluation purpose. The blog provides the SOA 12c step by step installation process on Windows 10 for the beginners. The complete list of SOA 12c Hardware and Software requirements can be referred on the Oracle Link Oracle SOA 12c Certification Matrix under the section Oracle Fusion Middleware 12c Certifications -> System Requirements and Supported Platforms for Oracle Fusion Middleware 12c (12.2.1.4.0).xls
Software requirements for SOA 12c installation:
- Download JDK 1.8 from the Oracle Java download link Oracle JDK1.8 download Windows X64 and install on your local machine.
- Set up the JAVA_HOME in the Environment Variables.
- Install Oracle 12c Database from the Oracle site link Oracle 12c Database Download
- Ensure that Oracle SOA 12c quickstart is currently supported for Windows 64 bit and thus need to be installed on Windows 7 / Windows 10 64-bit machines only.
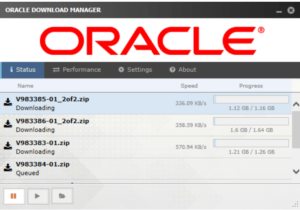
- Download the SOA12c 12.2.14.0 from the Oracle Software Delivery Cloud Oracle SOA 12c Download Link
Download V983385-01_1of2.zip and V983385-01_2of2.zip for Oracle Fusion Middleware 12c (12.2.1.4.0) SOA Quick Start for (Microsoft Windows x64 (64-bit) using the Oracle Download Manager.
Hardware requirements for SOA 12c installation:
| Hardware Requirement | Memory Allocation |
| SOA Server | 3 GB (Minimum) |
| OSB Server | 3 GB (Minimum) |
| Weblogic Server | 3 GB (Minimum) |
| Operating System and Other Software | 3 GB |
| Swap Memory | 2 GB |
| Temp Memory | 3 GB to 5 GB |
| RAM | 4 GB (Minimum) , recommended 8 GB |
SOA 12c Installation Process with Screenshots:
Open the Command Prompt and Run it as Administrator
Open the folder where quick start installer are being downloaded and extracted
Execute the below command in the Command Prompt
%JAVA_HOME%\bin\java.exe -jar fmw_12.2.1.4.0_soa_quickstart.jar
The Installer opens the SOA 12c quickstart installation window

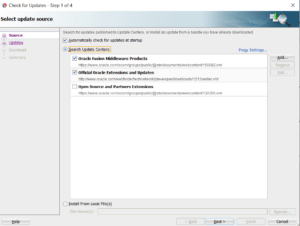
Skip the Auto Update Screen
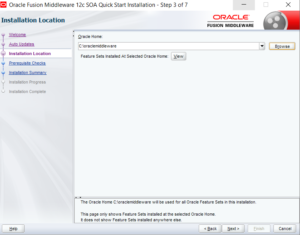
Enter the directory location for the SOA 12c Installation
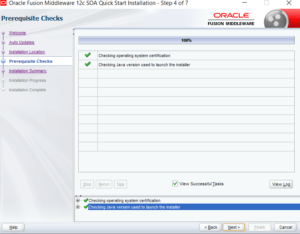
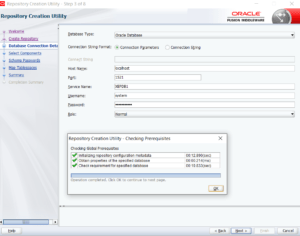
The next screen provides the Installation pre-requisite check performed
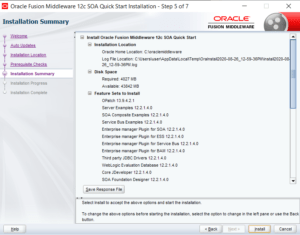
The below screen provides the SOA 12c Installation summary details
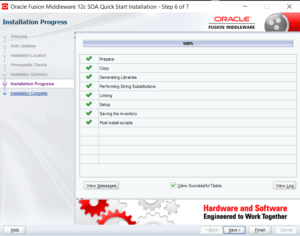
Installation Progress Screen
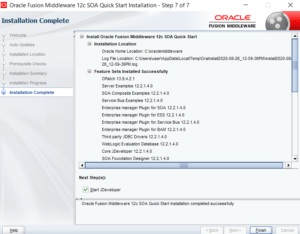
Installation Completion Screen
JDeveloper 12c SDK Extension Update
Open the Installed JDeveloper and click Help-> Check for Updates. The latest available updates are shown.
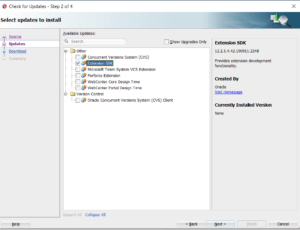
Click Next and Select the SDK Extensions for the JDeveloper
Click Next and then Finish to get the updates installed for JDeveloper. You might need Restart for the JDeveloper get the changes reflected.
How to Install Oracle XE 18c Database
Perform the steps provided in the below given blog for Oracle XE 18c Database Installation Oracle XE 18c Installation Steps
Repository Creation Utility (RCU)
The repository creation utility (RCU) is provided to CREATE the SOA Schema which is consumed by the SOA Services. The SOA Composite details will be residing in this schema. The SOA 12c installer provides the RCU Windows batch program to install the SOA Schema. The below given is the step by step installation process for RCU.
Pre-requisites for the RCU
- Supported Database should be installed in your local machine
- 4 GB Memory allocation required for Oracle Database
- SOA12c Software Installation is completed in your local machine
Navigate to the SOA Directory at the below given path and execute the Config batch in the command prompt as Administrator.
<SOA12c_Directory_Location>\oracle_common\common\bin\config.bat
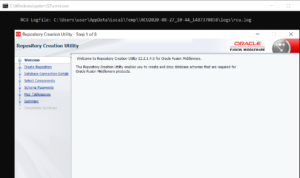
The Repository Creation Utility (RCU) Welcome Screen is opened
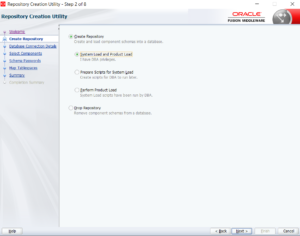
Select the RCU Creation Type
Enter the Oracle Database Connection details
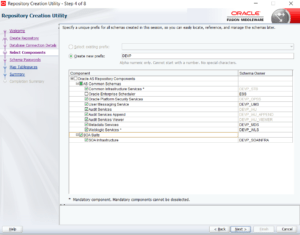
Select the SOA Component that need to be installed using RCU
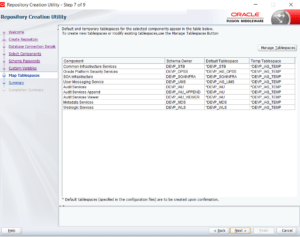
RCU Tablespace Mapping Verification Screen.
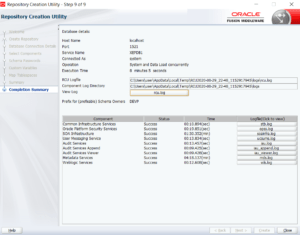
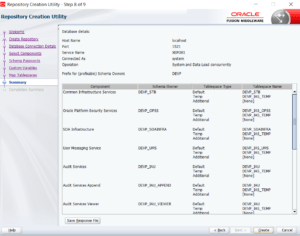
RCU Schema and Tablespace Summary Screen
RCU Successful Completion Screen